← All Tutorials
Iperius Remote Management Console : Web Administrative Area
The administrative dashboard of Iperius Remote provides all the necessary features for professional use of the remote support software.
In the administrative area, it is possible to:
- View the Remote Access Statistics and filter them by date, operator name, group and remote computer; it is also possible to export them in XLS format.
- Create and modify users (operators) and shared groups
- Enable advanced security features like 2FA
- Manage your address book, so the complete list of remote computers
- View the list of active remote desktop sessions in real time, with the possibility of terminating them
- Generate the Custom client (with your company info, also changing the software name and icon)
To access the administration panel, open Iperius Remote and click on the “Administrative Area” link at the bottom of the program (see image below).
Or go directly to the address: https://remote.iperius.com
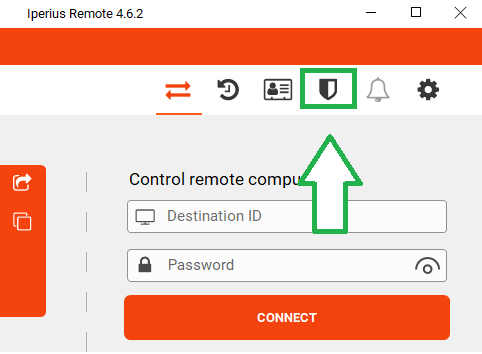
NB: the administration panel will be accessible only if the user role is “Administrator” (and clearly to the Master account).
The first screen displays a series of charts describing the connection statistics, such as the number of sessions performed on specific days, the percentage of sessions managed by each operator, the total duration of the sessions per day, etc..
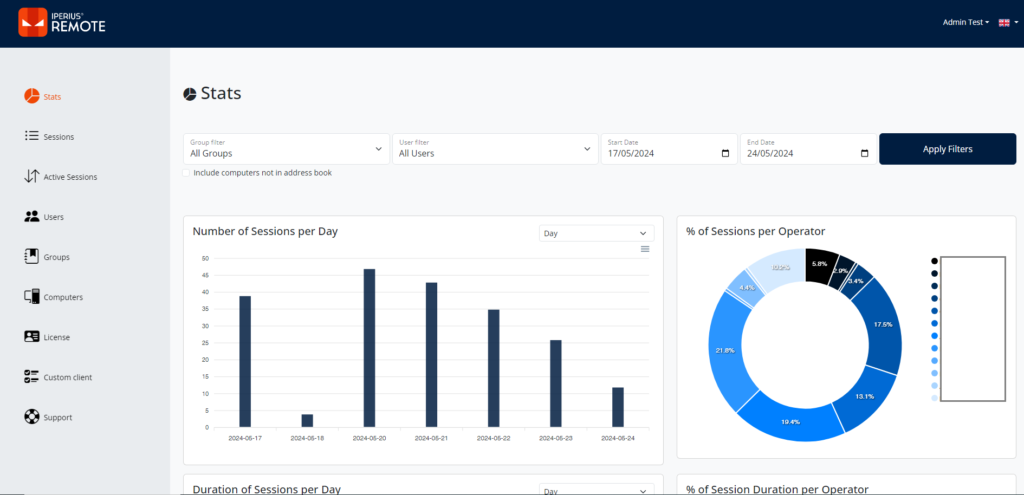
From the dashboard, it is possible to filter the statistics by Groups, Operator, and Date. Furthermore, the statistics are exportable in XLS format.
Let’s now describe, in detail, the fundamental operations that can be carried out within the panel.
Connection Statistics
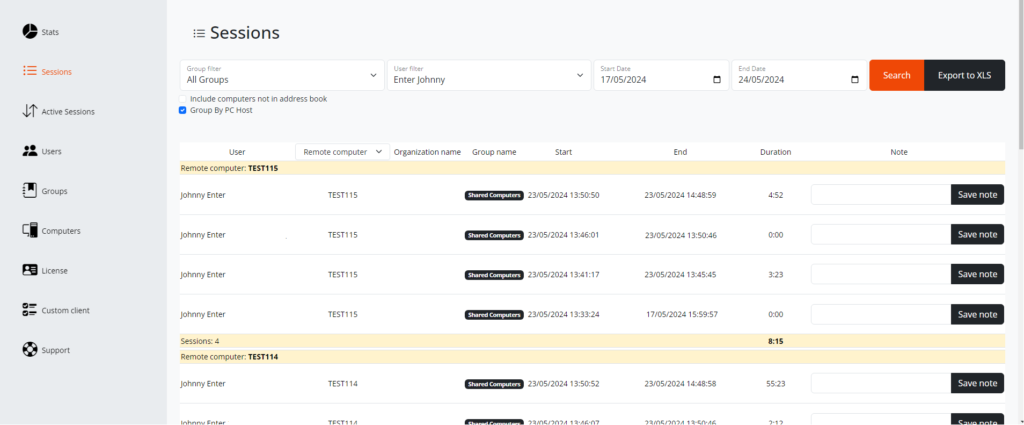
The filters that can be set are (starting from the left):
- The computer Group (default is set to “All Groups”).
- The Operator (default is set to the connected operator)
- The time range (from date to date) of the period to analyze.
It is also possible to include in the selection the connections made to computers not included in the Address Book, and select the remote computer to which you have connected.
Finally, with the “Export XLS” option, it is possible to export the statistics tables in Excel format.
Each row shows the name of the operator who connected, the computer to which they connected, the group of the remote computer, the start date of the connection, the end date, the actual connection time, and the Notes field.
Creating a New Operator
To create a new operator, from the left menu click on “Operators”. We will then see the list of all operators, with information about the Operator’s status, allowed Groups, Role, and whether they have 2FA enabled:

At this point, click on “Add User” and enter the data of the operator you want to create.
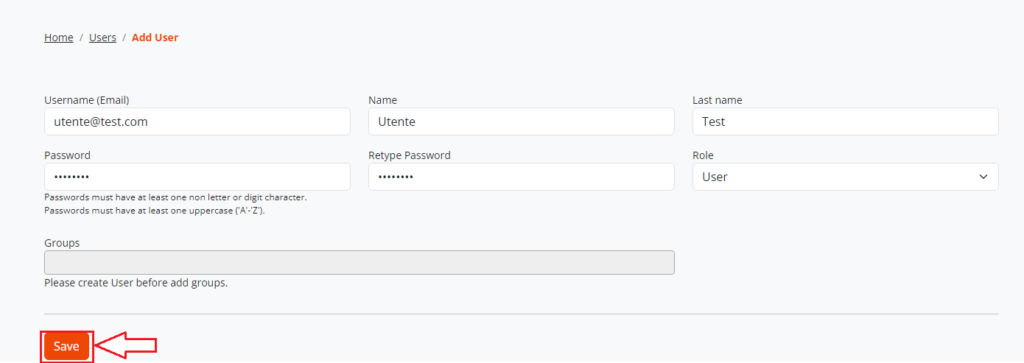
In addition to first name, last name, and username (email address), you will need to enter a username and password according to the following criteria:
– the username must be alphanumeric and cannot contain special characters except “@” and “_”;
– the password must be at least 8 characters long, including at least one uppercase, one lowercase, and one special character.
Finally, you can choose a role to assign, choosing between “User” and “Administrator”, depending on the permissions you want to grant to the operator:
– the “User” role allows only the creation of private groups and viewing their own connection statistics;
– the “Administrator” role allows access to the administration panel to create/modify users and shared groups, and to view the statistics of all operators in the license;
The box below, where it is possible to specify the “Groups”, cannot be modified before confirming and creating the user itself.
After entering all the data, just click on the “Save” button at the bottom right to create the user. If all data has been entered correctly, a confirmation message will be displayed, and the user will be added to the list of operators.
If we click on the Operator just created, we will see that the “Groups” box has been automatically populated with all the allowed shared groups.
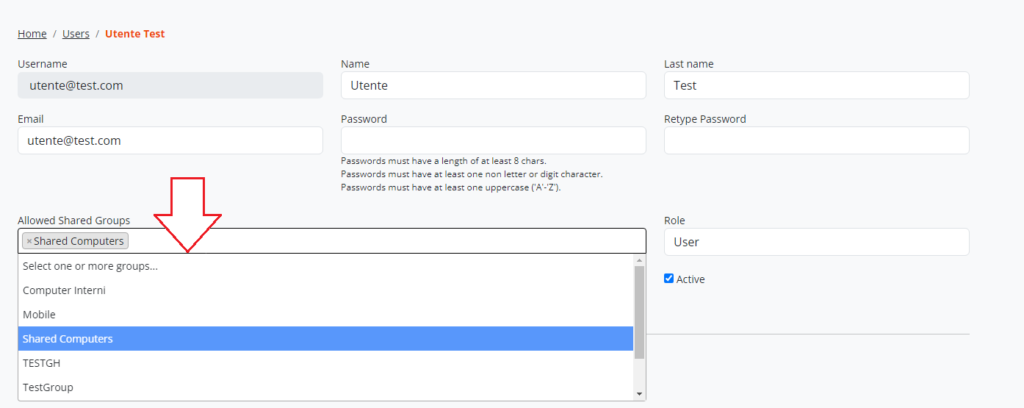
Now it is possible to modify this field, removing or adding specific groups.
Creating a New Group
To view the shared groups present in the license, just click on “Groups” in the left menu (see image below):

To create a new shared group click on “Add Group”
At this point, enter the data of the group you want to create: it is possible to enter data such as name, address, phone, etc., so as to consider the group as an actual grouping of all the PCs of a particular company.
The boxes below, “Computer” and “Users”, cannot be modified before confirming and creating the group itself.

After entering all the data, just click on the “Save” button at the bottom to confirm and create the shared group.
If all the data has been entered correctly, the group will be displayed in the list of Groups.
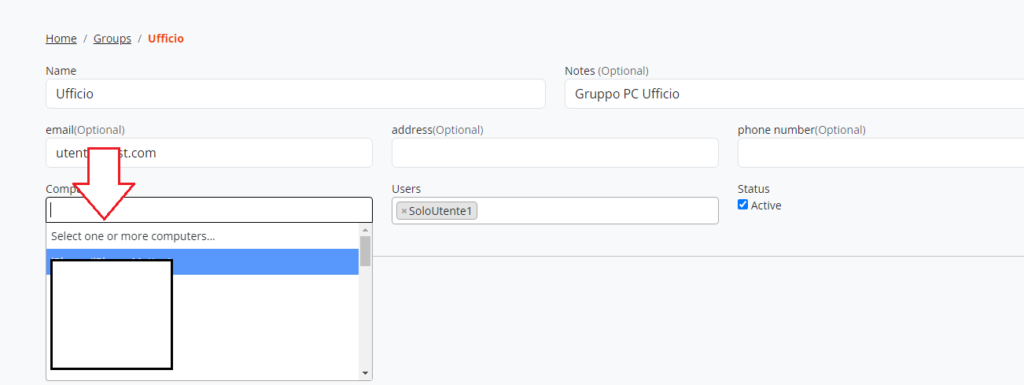
After creating the shared group, it will be possible to modify the main information, deactivate or delete it, and add computers and users.
Just select them from the dropdown menu, as shown in the following image:

Manage remote devices
In the administrative panel, it is possible to modify the basic information of a PC in our list of computers (remember that the list of computers will include all the computers we have added to Address Book).
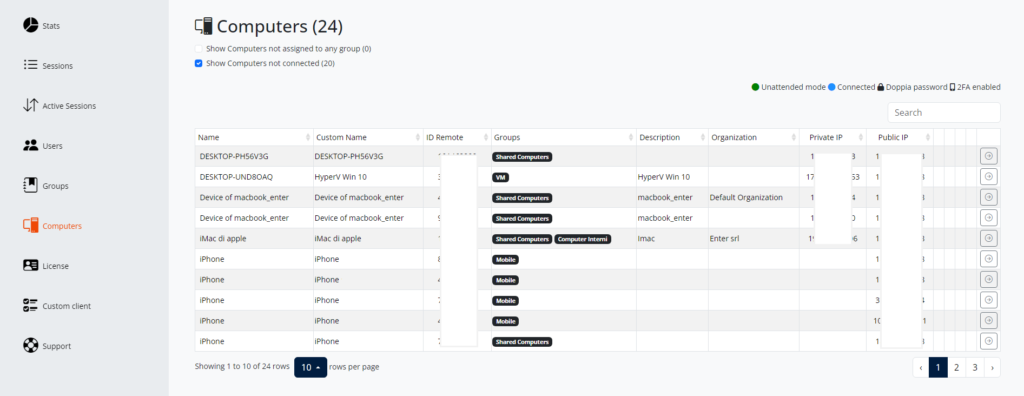
It often happens that the original name of Server systems, Workstations, or simple PCs is too generic (Server2012, Windows10, LAPTOP-45gAJS, etc.), not allowing us immediate recognition of the machine we need to connect to.
With Iperius Remote, we can overcome this problem by modifying the name of the computer displayed in the address book: obviously, the modification is not made on the machine and the software, but only in the display of data in the reserved area. The field that allows this modification is “Custom Name“.
It is possible to edit the computer information by adding the Custom name, add the computer to other groups, and also protect the computer with a custom password that will be valid only for that workstation.
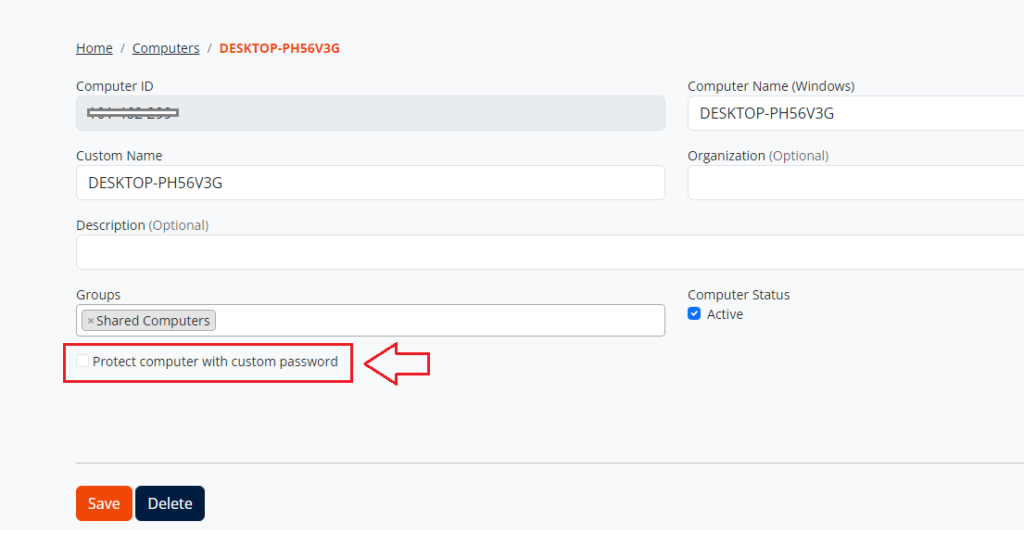
To confirm the changes, click on the “Save” button.
If the changes are applied successfully, a confirmation message will appear, and the computer’s name will be immediately changed even within the Computer List .
Active Sessions
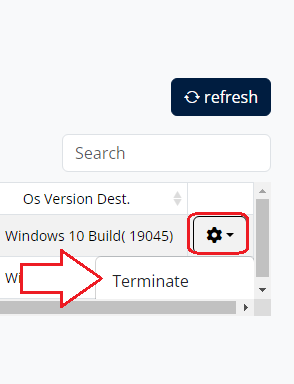
In the administrative panel, it is possible to see the Active Sessions in real time with all the information related to the connection, such as the remote ID of the local and remote PC, private and public IP of the local PC, start date of the connection, etc.

It is possible to terminate the connection at any time, by clicking the icon on the right “Terminate”
Generation of Custom Client
Finally, from the Administrative Panel, it is possible to create the customized versions of Iperius Remote:

For the generation of the custom version, refer to the specific tutorial
For any questions or doubts regarding this tutorial,
Contact us