← All Tutorials
Iperius Remote 4: Configuration Guide
This is a guide for the configuration of Iperius Remote 4, which is not a simple version update but a real new software, totally rewritten and based on the latest state-of-the-art technologies and which will introduce notable improvements in performance, video transmission quality and usability, thanks also to a powerful, highly scalable server infrastructure.
Follow this configuration guide in order to have an overview of the new product and the main features and differences introduced compared to version 3.x.
We remind you that it is not possible to connect from an Iperius Remote 4 to an Iperius Remote 3 or vice versa, versions 3 and 4 can be used on the same computer without any conflict, but are not compatible with each other.
So, as first step you need to update Iperius Remote 3.x to Iperius Remote 4 following this tutorial: https://www.iperiusremote.com/18649/how-to-update-to-iperius-remote-4/
Once Iperius is updated on the remote computer, you can configure the software on your local Iperius Remote.
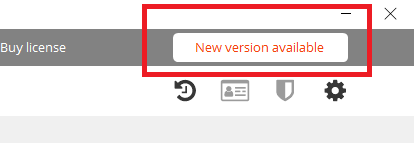
We strongly suggest to update the software anytime you see that a new update is available. You can see the message here:
Master account
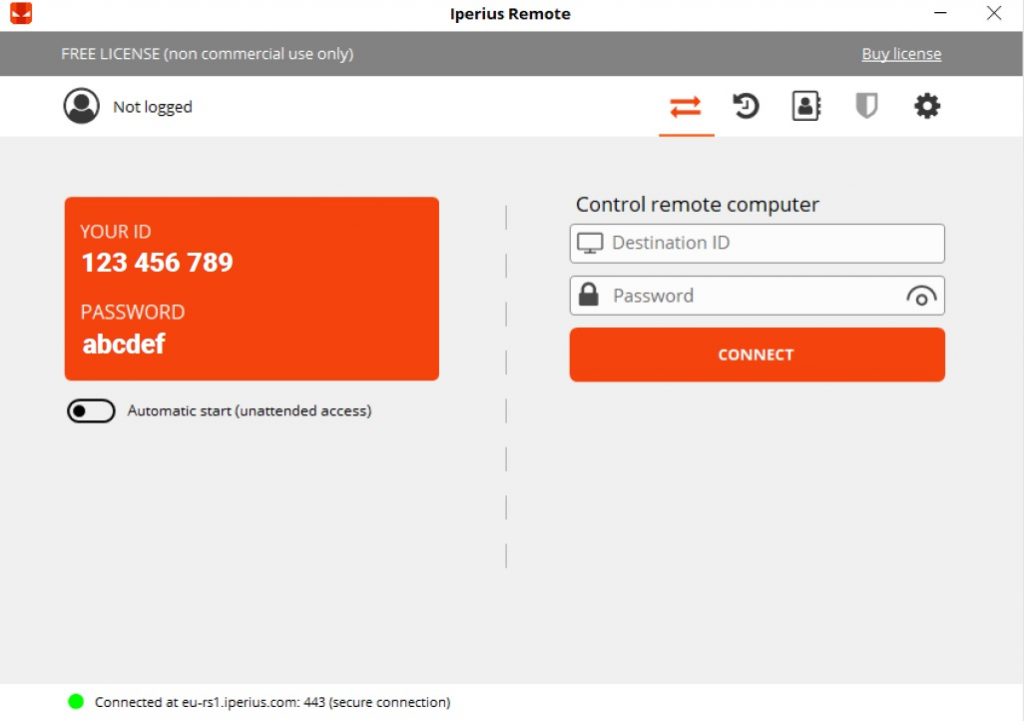
You need to configure inside the software the Master account credentials you used for Iperius version 3.x (otherwise you can request Test Master Account credentials writing to our support mail ).
You can add the Master account credentials in the section “License” as following:
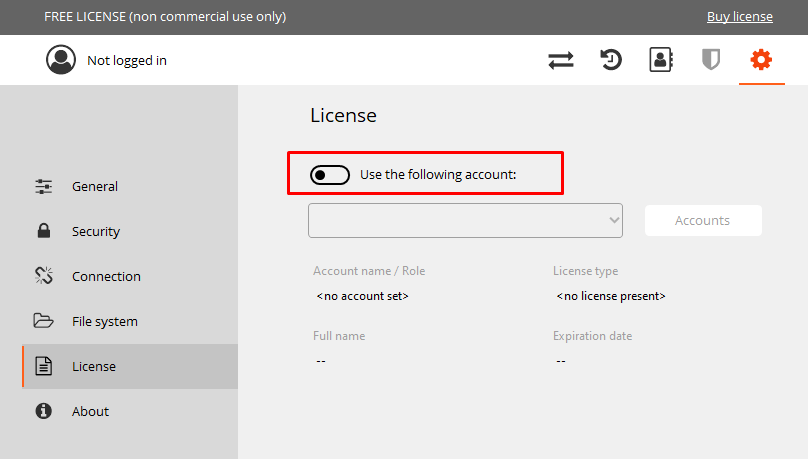
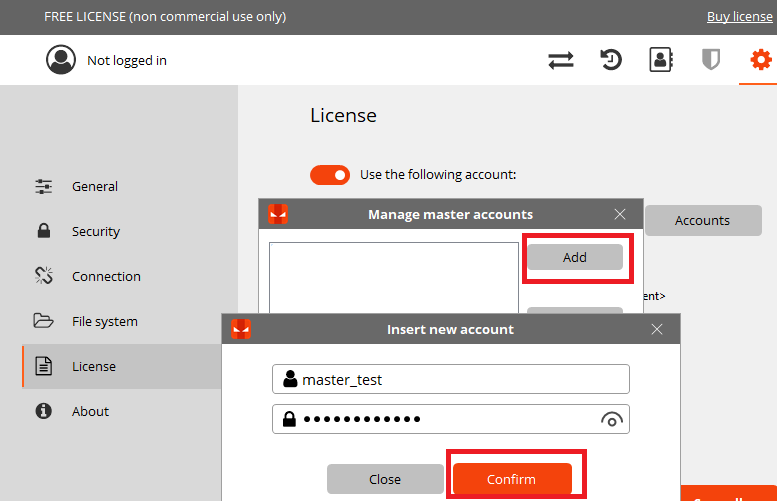
Remember to click on “Save all” button in order to save the whole settings, Iperius Remote will show you the saving progress bar and the paid license is activated.

The Master account is well configured.
Then check if these options are enabled, in order to see all your remote computers in the Address Book:

If you come back on the Home of the software, as well as the activation of the Paid License, you have 2 icons:
- “Administrator Area” that redirect to the Admin Panel (as in Iperius Remote 3.x version), where you can create operators and groups, check the Statistics and export them in csv (for more information have a look at this tutorial)
- “Address Book” where you have your imported Address Book and the future remote computers you will add.

Further Settings
Go to the “Settings” icon and fill the fields in General tab.
As well as the Company name and Computer Description, you can see several options above as “allow only viewing” in case you receive remote connections or “not allow to be added to an address book” in order that during remote connection the machine cannot be added in the address book of the control.

In the “Security” tab you find the options for configuring a specific password to access the computer and even a specific password to protect the software configuration:

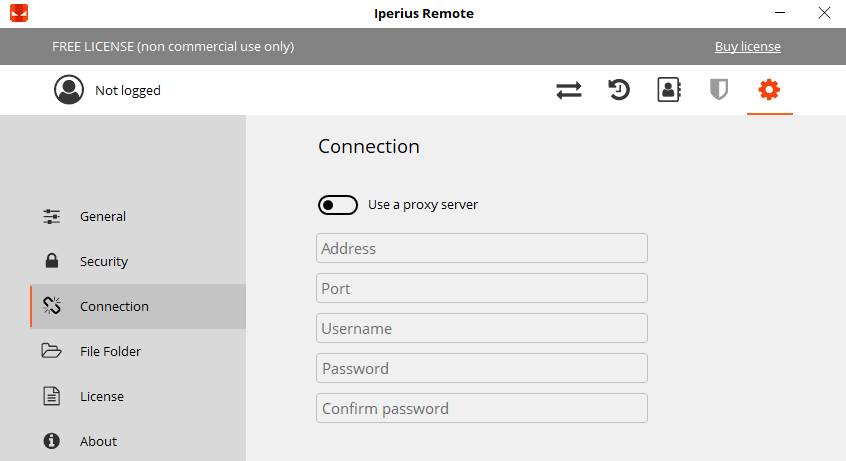
In the tab “Connection” you can set a proxy connection, if exists, and even specify the Remote Server (it’s set as “Automatic” by default).
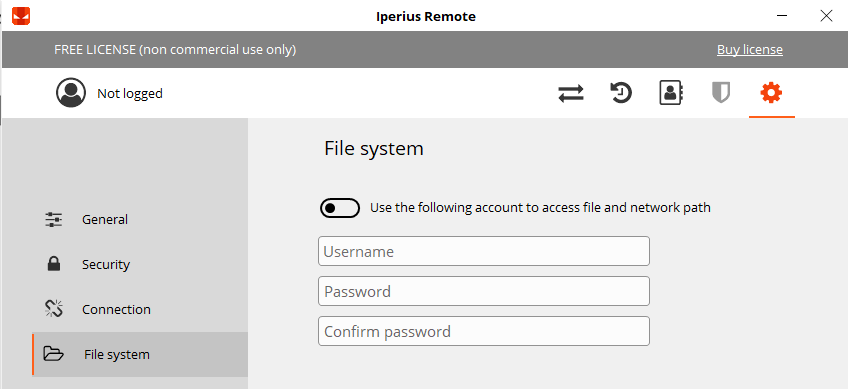
In “File System” tab you can configure a network account if, in the File Transfer, you need to connect to a specific network path for transfer files and folders from and/or to the host computer.
In the tab “About” you have general Information and the direct link to the support page

Remember to click on “Save all” button in order to save the whole settings, Iperius Remote will show you the saving progress bar.
Start Remote Connection
Now you can start to connect to your customers!
You can connect searching the remote computer from your Address Book or inserting ID and password, so what you need are the customer credentials.
With Iperius Remote 4 now is really simple to connect, the software is always in receiving mode as you open it and the customer has only to share his credentials:

If you want to enable the Service (Unattended access) of course is possible as in Iperius versions 3.x
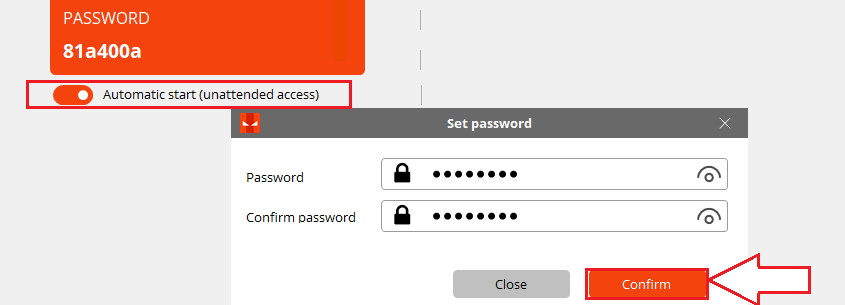
Just enable “Automatic Start” specifying a password, in this way every time the computer restarts, Iperius Remote 4 runs as Service and you can connect anytime to the remote computer.
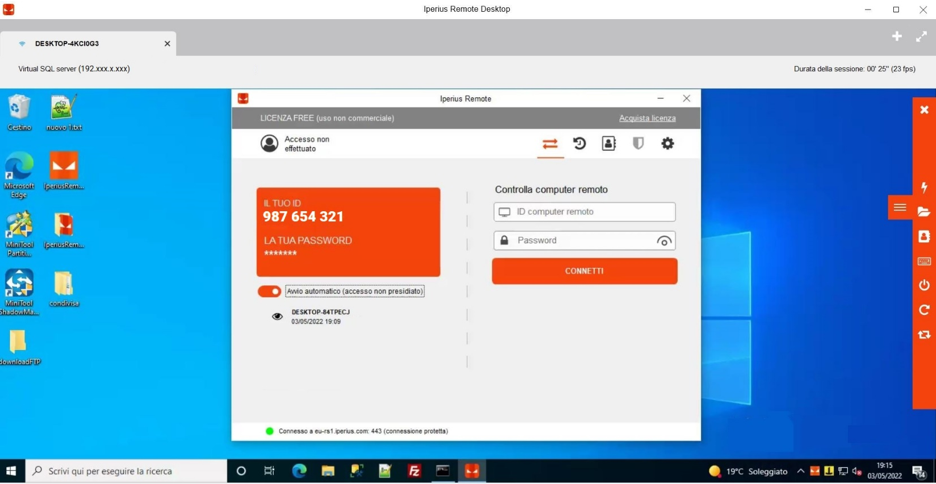
Connect to the customer with ID and password as in the following example:

Now you are connected and you can test the speed and the high performance of the new Iperius Remote software.
The Client account credentials doesn’t exist anymore in Iperius Remote 4 , so if you want to add a remote computer in your Address Book now is really easy.
In the sidebar there are several options, among these you have the possibility to add this customer to your address book, just follow the instruction above:
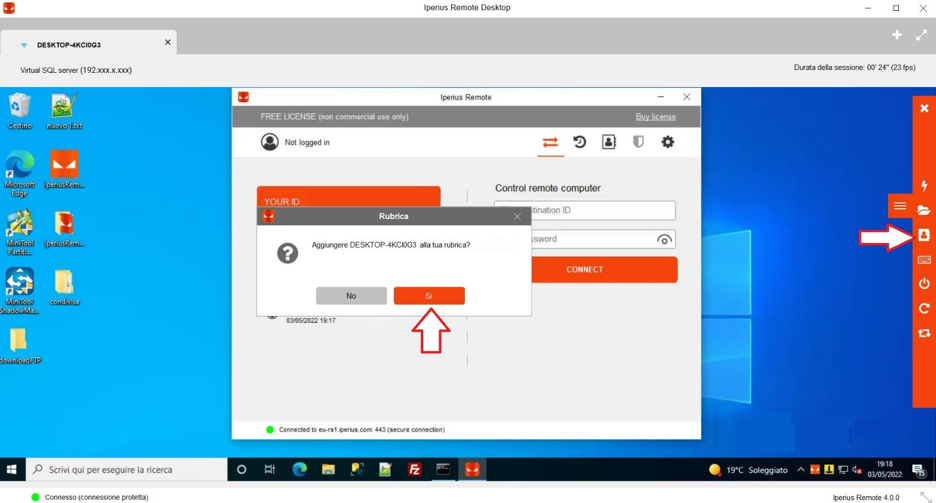
You can see the computer now in your Address Book and connect to him just making a double click here:
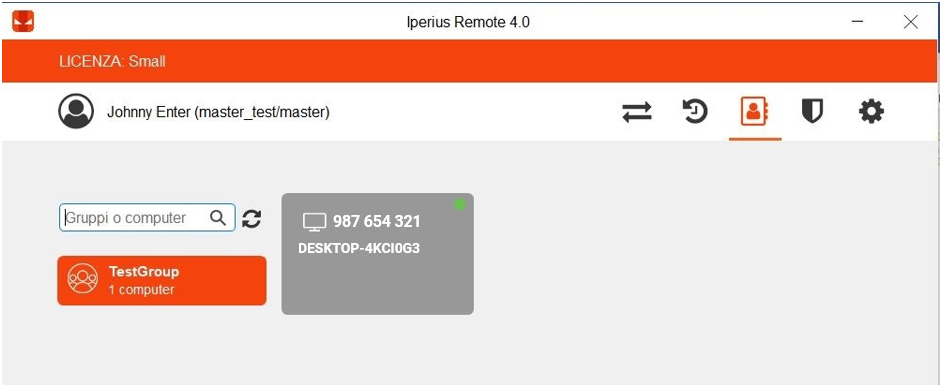
NB: Only if the Computer is added in the AddressBook is possible to have the Connection Statistics on the Admin Panel , otherwise the connection is not registered on the Dashboard (as in Iperius Remote 3.x version)
However, the remote computer can decide to not be added to any Address Book just enabling this option:
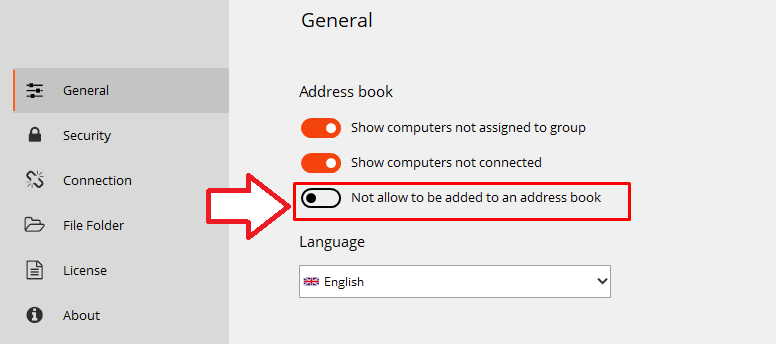
More, the remote computer can close the Connection any time in this way:
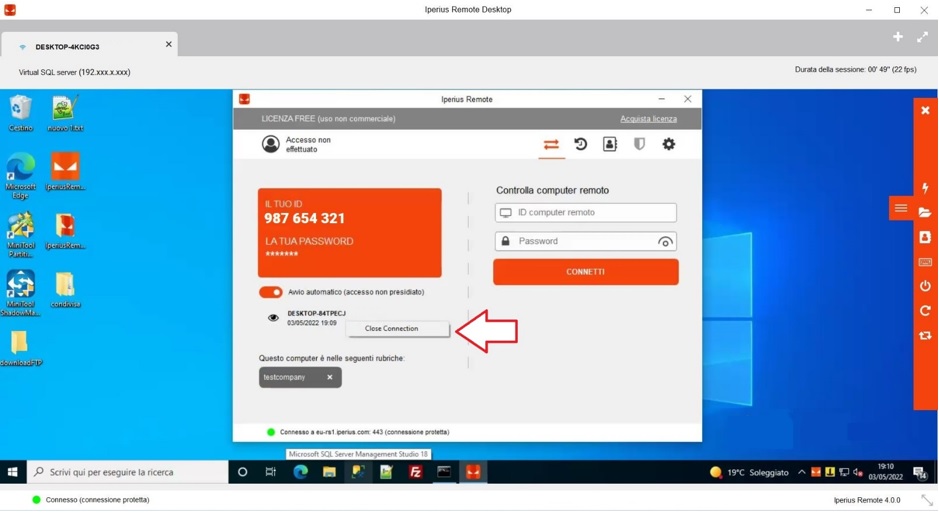
If you are not yet an Iperius Remote customer, click here to compare editions and buy a license. You will have access to all the advanced features for remote support and smart working.
For any questions or doubts regarding this tutorial,
Contact us